Snapper Belt Replacement Diagram – Belt diagrams can be utilized to understand the layout and routing of belts within various mechanical systems. These are diagrams of visual representation of how belts are positioned around components. This is useful for mechanics, engineers, and DIY enthusiasts working on engines, HVAC system or any other machine driven by belts.
Types of Belt Diagrams

- Serpentine diagrams can be used to design a single belt that drives multiple devices like an alternator, power steering pumps, or air cooling compressor.
- Timing-belt diagrams show where and how to align the timing belt. It connects the crankshaft with the camshaft(s) and ensures that the valve is properly timed.
- V belt diagrams demonstrate the way that V-shaped belts are placed in older engines, or other specialized systems.
Belt Diagrams The Key Components

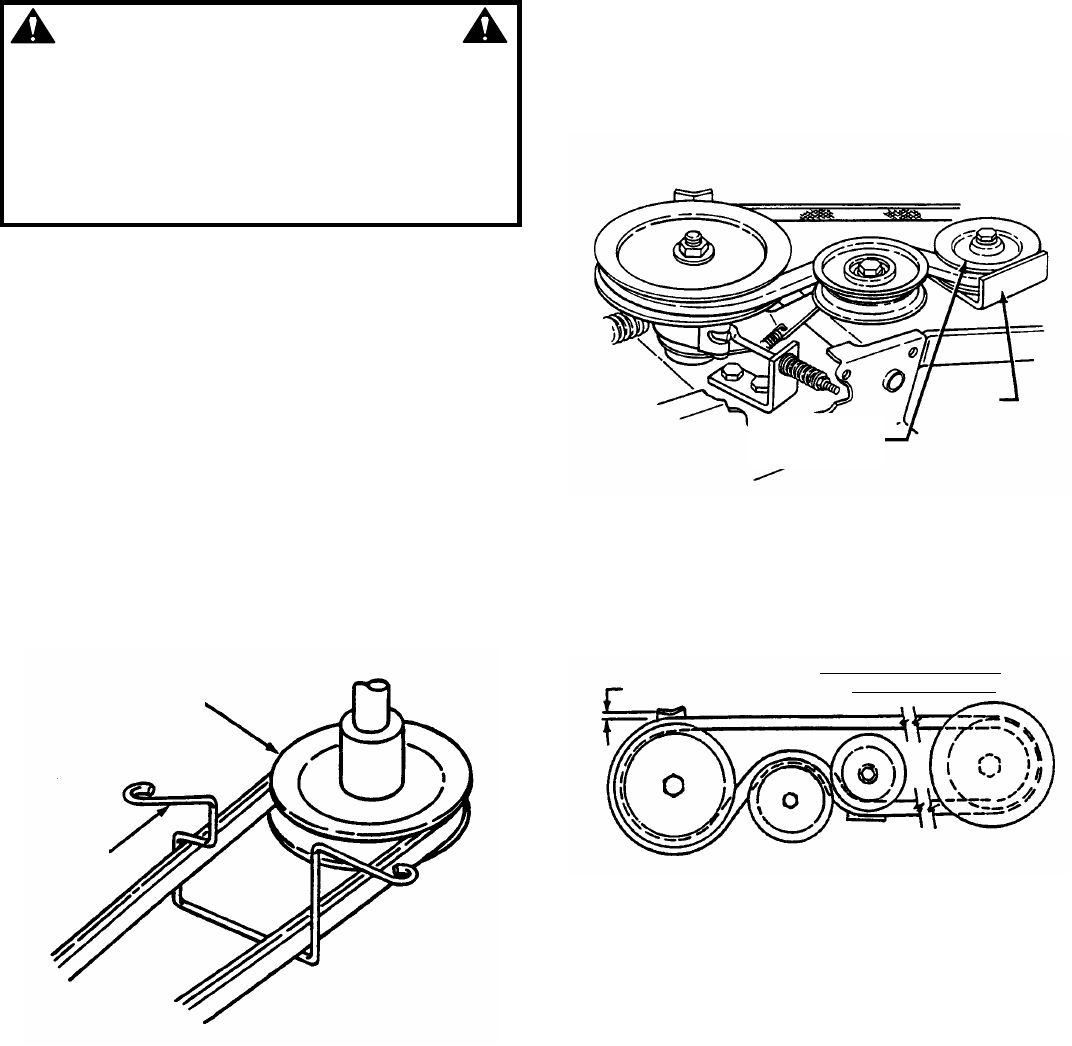
- The Pulleys are circular machines that wrap belts around, transmitting power to a single component.
- Belts are the flexible bands that transmit power between pulleys.
- Tensioners hold the belt in a tight position to prevent slippage.
How to Read the Belt Diagram
- Understanding symbols and notations, as well as the way they are used can help you recognize the elements and routing patterns in the diagram.
- Identification of crucial components like pulleys belts, and tensioners allow you to see the layout of the system.
- The capability to analyze routing patterns can reveal how the belt travels through it, and how it influences other elements.

We’ve got an step-by-step procedure for creating belt diagrams:
- Gathering important information Measure, describe, and arrange belts, components and their positions accurately.
- Sketch The First Layout.
- Add Pulleys and Tensioners.
- Design the Belt Routing Schema Sketch out the path of your belt(s) around pulleys. Make sure you follow any manufacturer or industry standards.
- Make sure you’ve refined your HTML0 diagram.
Tips and tips for making Belt Diagrams
- Software tools are able to simplify the process of creating professional-looking diagrams.
- It is essential to gather accurate information from manufacturer specifications and service manuals to make a reliable diagram of the belt.
- Checking the diagram twice for mistakes before you submit it to the editor ensures accuracy and the reliability. This eliminates any confusion that may arise during repairs or maintenance.
Conclusion
For anyone who uses belt-driven machines, it’s essential to have a good knowledge of how to construct belt diagrams. This will allow you to be better prepared to tackle any task that involves belts and pulleys by becoming familiar with the different types and components, as well as how to build them correctly. Our tips and tricks can assist you in creating clear, precise diagrams to improve your efficiency.
Gallery of Snapper Belt Replacement Diagram


