
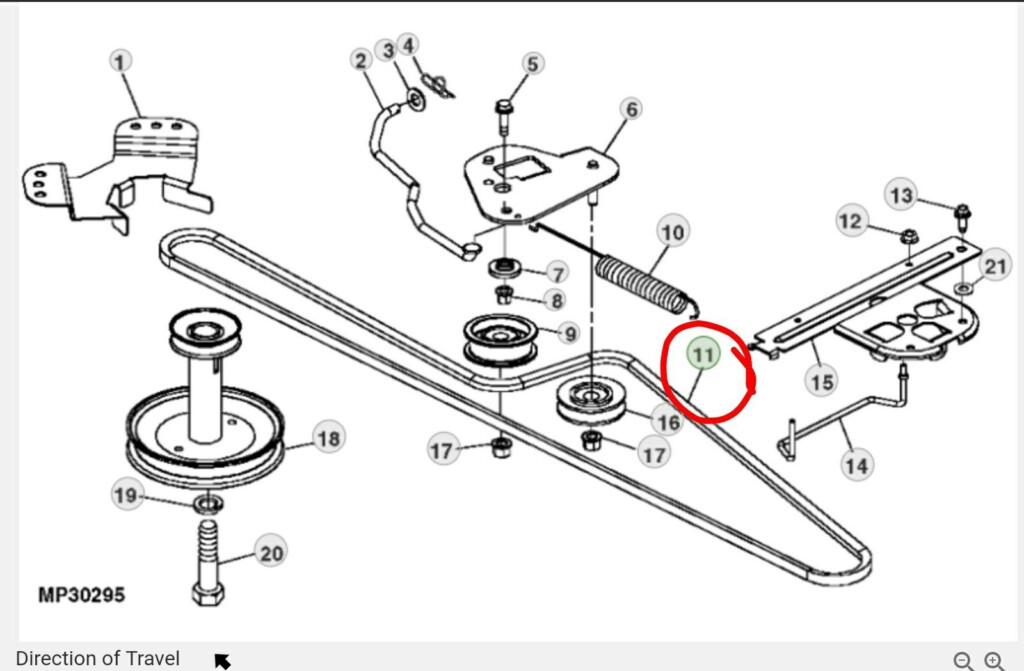
John Deere D170 Transmission Drive Belt Diagram – Belt diagrams help you understand the way belts are placed in various mechanical systems. They show the way belts are positioned around various components, aiding mechanics, engineers, as well as DIY enthusiasts when working on HVAC systems, or any other belt-driven machines.
Types Belt Diagrams

- Serpentine belt diagrams will be employed when a single continuous, belt drives multiple devices.
- Timing-belt diagrams illustrate the location and method of aligning a timing belt. It connects the crankshaft with the camshaft(s) and assures the proper timing of valves.
- V belt diagrams demonstrate the location of various V-shaped conveyor belts inside older engines as well as specialized systems.
The Key Components of Belt Diagrams

- The Pulleys are circular devices that wrap belts around, which transmit energy to one part.
- Belts transfer energy between pulleys.
- Tensioners ensure a consistent tension on the belt in order to avoid sliding and ensure that it functions efficiently.
How can I look up the Belt Diagram
- Understanding symbols helps you identify components and routing patterns in the schematic.
- You can visualize the design of the system through identifying important elements, like belts, pulleys or tensioners.
- Understanding patterns of routing lets you to observe how the belt moves and affects different elements.
A step-by-step procedure for making a belt chart
- Gather important information: Accurately measure, specify and organize components, belt(s) and their arrangement
- Sketch an initial layout Sketch an outline of the layout of the system, with every pulley and tensioner.
- Add Tensioners and Pulleys Label each pulley or tensioner with the appropriate component (e.g. alternator and power steering pumps).
- Draw the Belt Routing Diagram Sketch out the route of the belt(s) around pulleys, making sure it follows industry standards or specifications from the manufacturer for the proper routing.
- Review and refine your diagram: Double-check every aspect of your work for accuracy, making any changes necessary to make a clear and straightforward diagram.
Tips, Tricks, and Methods to Build a Belt Diagram
- With the appropriate software tools, creating professionally-looking diagrams is much easier, faster, and more affordable.
- For creating a precise and useful belt diagram, it is crucial to gather accurate data from the specifications of the manufacturer service manuals or other reliable internet sources.
- Double-checking for mistakes prior to making your diagram final ensures accuracy and dependability, eliminating possible issues or confusion during repairs or maintenance tasks.
Conclusion
It’s crucial to be confident and competent in the ability to build belt diagrams for those who use belt-driven systems. When you’re familiar with the different kinds of diagrams, their components, and how to construct them correctly will make you more prepared to tackle any project which involves pulleys or belts. You can use our tips to make precise and clear diagrams that boost efficiency and effectiveness.
Gallery of John Deere D170 Transmission Drive Belt Diagram


