07 Gmc Acadia Belt Diagram – Belt diagrams are essential tools to comprehend the routing and layout of belts within various mechanical systems. They are visual representations that demonstrate how belts are connected to components. This can be useful for mechanics, engineers, and DIY enthusiasts who work on HVAC systems, engines or any other machine driven by belts.
Types Of Belt Diagrams

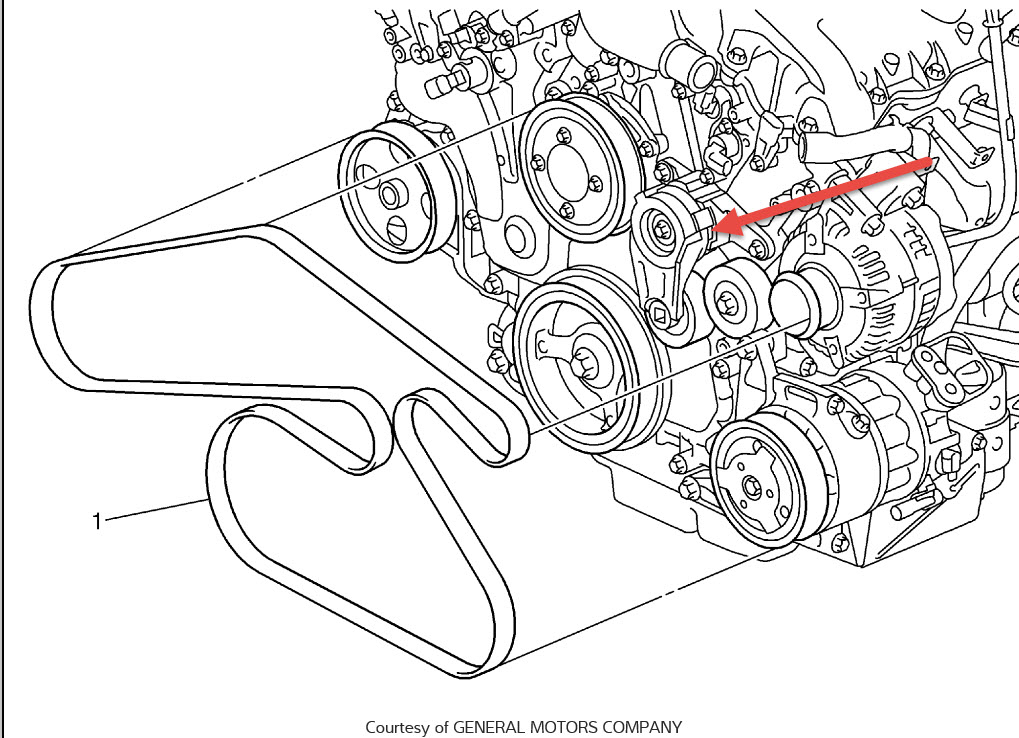
- Serpentine diagrams are utilized for a single belt that is used to drive multiple devices such as an alternator, power steering pumps, or air cooling compressor.
- Timing belt diagrams illustrate the location and the alignment of a timing chain which connects the crankshaft with camshaft(s), in order to ensure proper valve timing.
- V -belt diagrams show how V-shaped belts can be placed in older engines, or in other systems that are specialized.
Belt Diagrams : Key Components

- The Pulleys are circular gadgets in which belts are wrapped around, transmitting power to one component.
- Belts are the flexible bands that transfer power between pulleys.
- Tensioners ensure the correct tension of your belt, preventing slippage.
How to read a Belt Diagram
- Understanding symbols helps you identify components and routing patterns in the schematic.
- Identification of crucial components such as pulleys, belts, and tensioners allow you to visualize the layout of the system.
- Interpreting routing patterns reveals how the belt moves across it, and how it affects different components.
We’ve prepared an easy step-by-step guide to creating belt diagrams
- Gather Important Information Be precise in measuring and describing the components, belt(s), and their location.
- Sketch the Initial Layout. Sketch out a plan that shows the arrangement of the entire system. This includes the position of each tensioner and pulley.
- Add tensioners and pulleys Label each pulley and tensioner with the component it is associated with (e.g., power steering pump, alternator).
- Draw a Belt Routing Diagram. Draw the belt’s route around pulleys.
- Make sure you’ve refined your HTML0 diagram.
Tips, Tricks, and Methods to Build a Belt Diagram
- Utilizing software tools could create professional-looking diagrams more simple, precise, and efficient.
- The secret to creating a detailed and useful belt diagram is to accurately collect details from specifications of the manufacturer or service manuals.
- Double-checking for errors prior to finalizing your diagram will ensure the accuracy.
Conclusion
It is important to be confident and competent in your ability to construct belt diagrams for people who work with belt-driven system. You’ll be more prepared to tackle any project that involves belts or pulleys if you’re familiar with the different types of diagrams and their parts. Utilize our suggestions and tricks to create precise, clear diagrams that will make your work easier and more effective.
Gallery of 07 Gmc Acadia Belt Diagram


